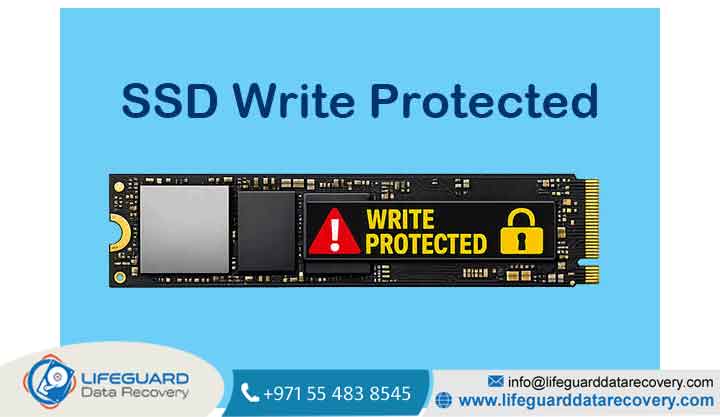
Because you can still view, open, and copy files off the drive, a write-protected SSD often feels like a minor software bug or a simple permission glitch.
However, storage hardware operates differently than traditional spinning hard drives. Write protection on an SSD can stem from two entirely different root causes: a superficial software/operating system lock or a permanent hardware protection mechanism triggered directly by the drive’s internal controller when memory cells reach their end-of-life.
This comprehensive, long-form guide walks through everything you need to know about write-protected SSDs. You will learn how SSD failure mechanisms work, how to back up your data safely, how to run diagnostic tests, step-by-step methods to fix software-based write locks across Windows systems, and how to identify when a drive must be replaced.
Understanding SSD Write Protection: Software Lock vs. Hardware Failure
To fix a write-protected SSD, you must first understand why the drive locked up in the first place. Solid-State Drives rely on NAND flash memory cells to store digital information electronically. Unlike traditional Hard Disk Drives (HDDs) that use motorized spinning platters and magnetic heads, SSDs have no moving parts. However, flash memory cells possess a fundamental physical limitation: they can only endure a finite number of write and erase cycles.
When an SSD encounters severe operational anomalies or structural degradation, it enters Safe Mode (Read-Only Mode). This state disables all incoming write, edit, and erase commands while leaving existing data completely readable and accessible.
Write-protection causes fall squarely into two primary categories:
Software & Operating System Locks (Fixable)
In these scenarios, the physical SSD hardware is in perfect working order, but a software layer or logical file system flag is preventing modifications:
-
Corrupted File System Metadata: Sudden power loss, hard reboots, or unsafe removal of external drives can corrupt the drive’s file system (NTFS, exFAT, or FAT32). Operating systems like Windows or macOS will automatically remount a corrupted partition as read-only to prevent further structure damage.
-
OS Attribute Flags: Windows can accidentally assign a global or partition-specific read-only flag following a system crash or unexpected disconnection.
-
Windows Registry & Group Policies: Administrative security policies, corporate management profiles, or malware can flip registry values that disable write permissions across attached storage drives.
-
Encryption Stalls: Incomplete encryption or decryption cycles involving tools like BitLocker can temporarily restrict write access to preserve data integrity.
Hardware & Firmware Locks (Permanent Safety Mode)
When the drive’s internal controller detects hardware wear or critical memory block failure, it engages a firmware-level write lock. This is not a glitch; it is an intentional safety feature designed by manufacturers to prevent sudden, catastrophic data loss:
-
TBW (Terabytes Written) Exhaustion: Manufacturers rate SSD lifespans in Terabytes Written. Once an SSD reaches its maximum write endurance threshold, NAND flash cells lose their ability to retain new electrical charges reliably. The controller locks the drive so existing files are not overwritten by corrupted data.
-
Depletion of Over-Provisioned Spare Blocks: SSDs reserve extra memory capacity known as spare blocks. When active cells fail, the controller transparently swaps them out with spare blocks. Once all spare blocks are exhausted, no healthy cells remain for new writes, triggering read-only mode.
-
Controller or Memory Table Failure: If the SSD controller suffers severe voltage spikes, controller corruption, or translation table errors, it defaults to emergency safe mode to keep remaining data accessible for backup.
Crucial First Step: Back Up Your Data Immediately
Before running diagnostic utilities, executing command-line prompts, or altering system settings, you must immediately back up your critical files to a healthy external drive, secondary storage device, or cloud storage service.
Because a write-protected drive still allows read commands, you can freely select and copy your documents, photos, databases, and media. Do not attempt formatting, low-level partition erasure, or intensive repair utilities before securing your primary files. If the SSD is locked due to an impending hardware controller failure, forcing intensive repair operations could cause the controller to shut down completely.
Diagnosing Your SSD’s Health (SMART Attributes)
The very first diagnostic step is determining whether your write protection is caused by software settings (which can be fixed) or hardware wear-out (which requires replacing the drive).
You can determine this by checking your drive’s S.M.A.R.T. (Self-Monitoring, Analysis, and Reporting Technology) health attributes using industry-standard diagnostic tools.
Recommended Free SMART Diagnostic Tools:
-
CrystalDiskInfo (Windows – Standard Edition)
-
DriveDx (macOS)
-
Manufacturer Utilities: Samsung Magician, Crucial Storage Executive, Western Digital Dashboard, Kingston SSD Manager, or Intel Memory and Storage Tool.
How to Interpret SMART Diagnostic Results:
-
Download, install, and launch CrystalDiskInfo (or your drive manufacturer’s official software).
-
Select your write-protected SSD from the top drive selection bar.
-
Inspect the overall Health Status indicator and key raw values
Key SMART Attributes to Monitor:
-
Media and Data Integrity Errors: Non-zero values indicate physical memory block corruption.
-
Available Spare: If this value drops to 0%, the drive has run out of reserve memory blocks to replace degraded cells.
-
Percentage Used / Wearout Indicator: Shows how much of the drive’s rated TBW lifespan has been consumed.
If your diagnostic tool shows “Bad” or “0% Remaining Health,” stop troubleshooting. The write protection was enforced permanently at the firmware level by the drive controller. Transfer your files off the drive and prepare to replace it under warranty or purchase a new drive.
If your diagnostic tool shows “Good,” your hardware is in working order. Proceed through the step-by-step software fixes below to restore write access.
Step-by-Step Solutions to Fix Software Write Protection
Follow these methods sequentially to clear software-level write protection flags, adjust operating system policies, and resolve file system errors.
Clear Read-Only Attributes via Diskpart (Windows)
Windows frequently applies an administrative read-only attribute flag to storage volumes after unexpected system crashes, power cuts, or improper USB disconnections. You can clear this attribute flag using the built-in diskpart command-line utility.
Step-by-Step Instructions:
-
Click the Start Menu, search for Command Prompt or Terminal, right-click it, and select Run as Administrator.
-
Type
diskpartand press Enter to launch the Disk Partition tool. -
Type
list diskand press Enter. A table listing all connected storage drives will appear. -
Identify the disk number corresponding to your write-protected SSD by checking the capacity column (e.g., Disk 0, Disk 1, or Disk 2).
-
Type
select disk X(replace X with your actual SSD disk number) and press Enter. -
Type
attributes diskand press Enter to check the current flag settings. Look for the line Current Read-only State. -
Type the following command to clear the attribute:
Plaintext -
Press Enter. Windows will respond with “Disk attributes cleared successfully.”
-
Type
exit, press Enter, and test if you can now create, edit, or delete files on the SSD.
Disable Write Protection in the Windows Registry
In some administrative environments or after certain system updates, a specific Windows Registry value named WriteProtect can enforce a system-wide write block on external or secondary drives. Clearing this registry value restores standard read/write privileges.
Step-by-Step Instructions:
-
Press
Win + Ron your keyboard to open the Run dialog box. -
Type
regeditand press Enter (or click OK) to launch the Windows Registry Editor. -
In the left navigation pane, navigate to the following folder path:
PlaintextIn the right panel, look for a DWORD (32-bit) Value named WriteProtect.
-
Double-click WriteProtect.
-
Change the number in the Value data field from
1(Enabled) to0(Disabled). -
Click OK, close the Registry Editor, and restart your computer to apply the policy change.
Repair File System Errors Using CHKDSK
If logical corruption in the file system structure (NTFS, exFAT, or FAT32) forces Windows to mount the SSD as read-only, running the Check Disk (CHKDSK) utility can locate and repair metadata inconsistencies.
Step-by-Step Instructions:
-
Open the Start Menu, type
cmd, right-click Command Prompt, and select Run as Administrator. -
Identify the drive letter assigned to your locked SSD in File Explorer (e.g., Drive
E:orF:)
-
Type the following command in the Command Prompt window
-
Plaintext (Be sure to replace X: with your actual SSD drive letter).Press Enter.
-
Parameter
/finstructs CHKDSK to fix errors found on the disk structure. -
Parameter
/rtells CHKDSK to locate bad sectors and recover readable information.
-
-
If the target drive is currently in use or is your main boot volume, Windows will ask if you want to schedule the check on the next system restart. Type
Yand press Enter, then restart your computer. -
Allow the scan to complete fully without interrupting your system.
Modify Folder and Security Permissions in File Explorer
Sometimes, the SSD itself is not write-protected at the drive level, but specific user permissions on the root directory or file folders have been modified to Read-Only.
Step-by-Step Instructions:
-
Open File Explorer (
Win + E) and navigate to This PC. -
Right-click your write-protected SSD volume and select Properties.
-
Navigate to the Security tab and click the Advanced button near the bottom.
-
Check the listed Owner at the top of the window. If it shows an unknown account or restricted permissions, click Change.
-
Enter your current Windows account username, click Check Names, and click OK.
-
Check the box labeled “Replace owner on subcontainers and objects” and click Apply.
-
Return to the main Security tab, select your user account under Group or user names, and click Edit.
-
Under the Allow column, make sure Full Control and Modify are checked.
-
Click Apply, then OK, and check if write permissions are restored.
Disable BitLocker or Third-Party Encryption
If your SSD was encrypted using Windows BitLocker or third-party drive protection software, an interrupted encryption cycle, pending recovery state, or corrupted TPM handshake can cause the OS to lock write operations to guard against unauthorized modification.
Step-by-Step Instructions:
-
Open the Start Menu, search for Manage BitLocker, and press Enter.
-
Locate your locked drive letter within the list of storage volumes.
-
If BitLocker is active or suspended, click Turn Off BitLocker or Resume Protection, then initiate a full decryption.
-
Allow the decryption progress bar to complete 100% without disconnecting the drive or turning off the computer.
-
Once fully decrypted, test writing a new file to the root directory.
Summary Comparison of Software Fixes vs. Hardware Lock
To quickly evaluate which method applies to your situation, review this operational breakdown:
| Diagnostic Metric | Software / OS Read-Only Lock | Hardware / Firmware End-of-Life Lock |
| SMART Health Rating | Good (Healthy / 80%+ Life Remaining) | Bad / Critical / 0% Remaining Life |
| Available Spare Blocks | Intact within normal range | Completely depleted (0%) |
| Diskpart Command Output | “Disk attributes cleared successfully” | Command succeeds, but drive remains locked |
| Format Attempt Result | Drive formats successfully | Fails with “Disk is write-protected” |
| File System State | May show raw/corrupt metadata | Metadata readable, but writes rejected |
| Primary Resolution | Clear attributes, run CHKDSK, or edit Registry | Back up files and replace the physical SSD |
How to Clone a Read-Only SSD to a New Drive
If your SSD is hardware-locked due to wear, you can easily clone the entire drive including your operating system, installed applications, and files onto a brand-new SSD. Because cloning only requires reading data from the source drive, a read-only SSD can serve as a valid clone source.
Basic Steps for Cloning a Read-Only SSD:
-
Connect a New Target SSD: Attach a new SSD of equal or larger capacity to your PC using an M.2 NVMe enclosure, SATA-to-USB adapter, or secondary internal motherboard slot.
-
Download Reliable Cloning Software: Use free or standard cloning utilities such as Macrium Reflect, Acronis Cyber Protect Home Office, AOMEI Backupper, or Clonezilla.
-
Select Source and Destination:
-
Source Drive: Choose your write-protected / read-only SSD.
-
Destination Drive: Choose your newly attached target SSD.
-
-
Initiate Intelligent Sector Copy: Start the cloning process. The software will read the complete file structure and raw data blocks from the locked drive and write them seamlessly onto the new drive.
-
Swap the Drives: Once cloning reaches 100%, shut down your system, disconnect the failed read-only drive, and replace it with your newly cloned SSD. Your system will boot up normally with full write privileges restored.
Frequently Asked Questions (FAQs)
1. Can a hardware-locked read-only SSD be repaired or reset?
No. When an SSD controller locks the drive due to physical NAND cell exhaustion, spare block depletion, or critical controller failure, the lock is hardcoded at the firmware level. No command-line utility, low-level formatting software, or firmware update can restore write cycles to worn-out flash memory cells. The drive must be replaced.
2. Will formatting an SSD remove write protection?
If the write protection is caused by a corrupted file system or software lock, formatting the drive via Disk Management or Command Prompt will successfully clear the lock. However, if the write protection was triggered by hardware failure or SMART wear-out, the format attempt will fail instantly with the error message “The disk is write-protected.”
3. Why does diskpart say “attributes cleared successfully” but the drive is still read-only?
If diskpart confirms that attributes were cleared, but your SSD immediately reverts to a read-only state upon opening File Explorer or rebooting, the lock is being enforced by the SSD controller firmware, not the Windows operating system. The drive controller is overriding OS commands to protect existing data from corruption, indicating physical drive failure.
4. Can a sudden power loss cause an SSD to become write-protected?
Yes. If your system loses power while the SSD is actively writing data or updating its internal Flash Translation Layer (FTL) mapping table, the file system metadata can become desynchronized. Upon rebooting, Windows or the SSD controller may mount the partition as read-only to prevent compounding structural damage until file system diagnostic tools are executed.
5. How long do modern SSDs typically last before running out of write cycles?
For standard consumer workloads (web browsing, gaming, office tasks, and light media editing), modern SSDs equipped with 3D NAND technology typically last anywhere from 5 to 10 years (or several hundred Terabytes Written). High-end enterprise or workstation drives subjected to continuous heavy database operations may hit write thresholds sooner, which is why monitoring SMART health status periodically is recommended.
6. Can third-party low-level format software unstick a write-protected drive?
Low-level formatting tools (such as SD Card Formatter or HDD Low Level Format Tool) can successfully rebuild partition tables if the issue is restricted to logical partition corruption. However, if the drive’s internal controller has entered emergency Safe Mode, it will reject all low-level write and erase commands transmitted by formatting tools.